iPhone 6 Plus Display Assembly Replacement
-
Notice:Power off your iPhone before beginning disassembly.
-
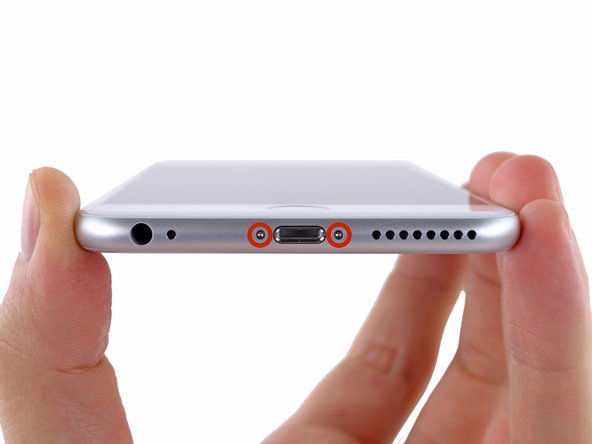
Remove the two 3.6 mm Pentalobe screws next to the Lightning connector.
-
Note:The next two steps demonstrate using the iSclack, a great tool for safely opening the iPhone 6 Plus that we recommend for anyone doing more than one repair. If you aren't using the iSclack, skip to Step 4.
-
If the plastic depth gauge is attached at the center of the iSclack, remove it now—it's not needed for larger phones like the iPhone 6 Plus.
-
Close the handle on the iSclack, opening the suction cup jaws.
-
Place the bottom of your iPhone in between the suction cups.
- Note:Position the iSclack's upper suction cup against the display, near the home button.
-
Open the handles to close the jaws of the iSclack. Center the suction cups and press them firmly onto the top and bottom of the iPhone.
-
Hold onto your iPhone securely and close the handle of the iSclack to separate the suction cups, pulling the front panel up from the rear case.
-
Note:The iSclack is designed to safely open your iPhone enough to separate the pieces, but not enough to damage any of the display cables.
-
Peel the two suction cups off your iPhone.
-
Skip the next three steps and continue on Step 7.
-
If you don't have an iSclack, use a single suction cup to lift the front panel:
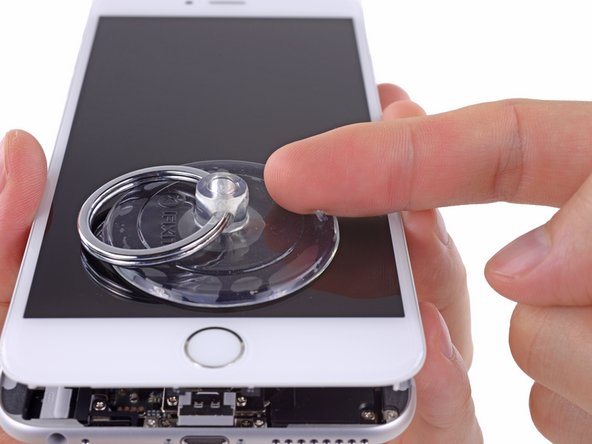
- Press a suction cup onto the screen, just above the home button.
- Note:Be sure the cup is pressed securely onto the screen to get a tight seal.
-
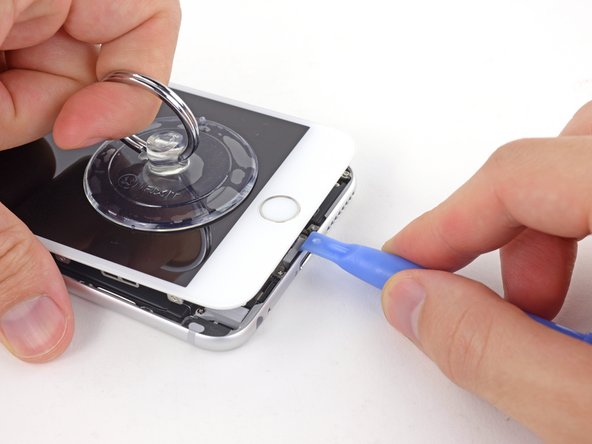
While holding the iPhone down with one hand, pull up on the suction cup to slightly separate the front panel assembly from the rear case.
- Notice:Take your time and apply firm, constant force. The display assembly is a much tighter fit than most devices.
-
Using a plastic opening tool, begin to gently pry the rear case down, away from the display assembly, while continuing to pull up with the suction cup.
-
Note:There are several clips attaching the front panel assembly to the rear case, so you may need to use a combination of the suction cup and plastic opening tool to free the front panel assembly.
-
Pull the plastic nub to release the vacuum seal on the suction cup.
-
Remove the suction cup from the display assembly.
-
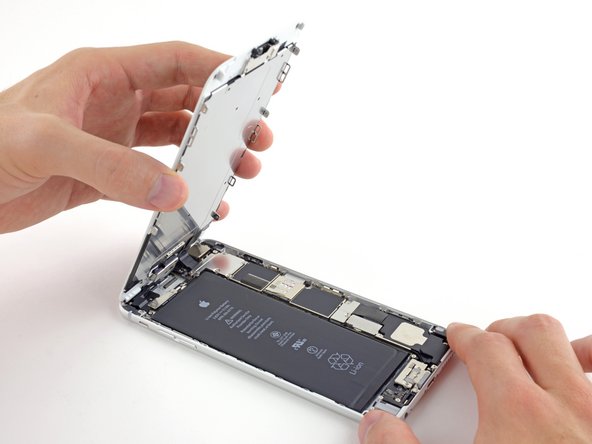
Pull the home button end of the front panel assembly away from the rear case, using the top of the phone as a hinge.
-
Note:During the next few steps, until you remove the front panel assembly, keep it supported at a 90º angle in relation to the rear case.
-
Note:Several clips along the top edge of the front panel form a partial hinge, allowing the front panel assembly to swing open like a book.
-
During reassembly, align the clips just below the top edge of the rear case. Then, slide the front panel upward until its top edge is flush with that of the rear case.
-
While holding the front panel open at about a 90º angle, remove the following screws securing the front panel assembly cable bracket:
- Three 1.2 mm Phillips #00 screws
- One 1.5 mm Phillips #00 screw
- One 2.9 mm Phillips #00 screw
- Remove the front panel assembly cable bracket from the logic board.
-
Notice:In the next four steps, take care to pry up only on the cable connectors, and not on their sockets on the logic board.
-
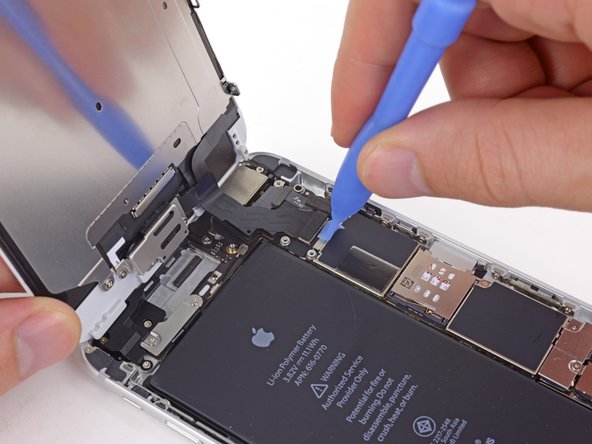
While still supporting the front panel, use a plastic opening tool to disconnect the front-facing camera and earpiece speaker cable connector.
-
Use a plastic opening tool to disconnect the home button cable connector.
-
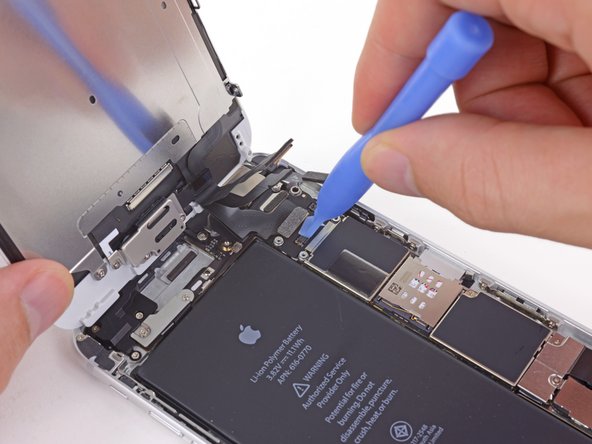
Use a plastic opening tool to disconnect the digitizer cable connector.
-
Finally, use a plastic opening tool to disconnect the display data cable connector.
-
Notice:When reassembling your phone, the display data cable may pop off the connector. This can result in white lines or a blank screen when powering your phone back on. If that happens, simply reconnect the cable and power cycle your phone. The best way to power cycle your phone is to disconnect and reconnect the battery connector.
-
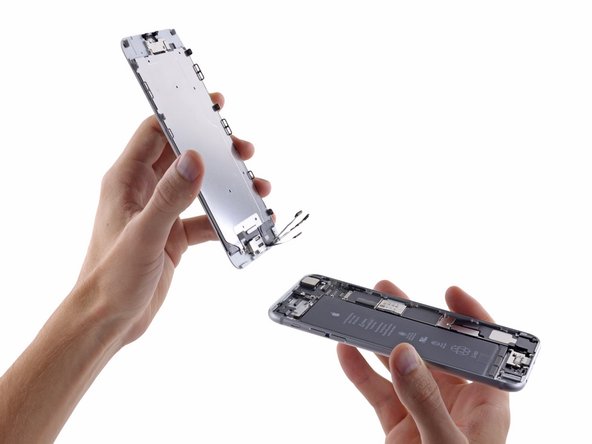
Remove the front panel assembly from the rear case.
-
Remove the two 1.8 mm Phillips #00 screws securing the home button bracket to the front panel.
-
Remove the home button bracket from the front panel assembly.
-
Use the tip of a spudger to disconnect the home button connector from its socket on the home button cable.
-
Carefully wedge the tip of a spudger underneath the home button connector cable.
-
Gently move the spudger across to separate the home button connector cable from the adhesive securing it to the front panel assembly.
-
Using your fingertip, gently push, but do notremove, the home button up from the opposite side to free one edge of the home button gasket from the front panel.
-
Notice:Do not push the home button all the way through—you only need to get a corner free, so that you can pry it free with a spudger.
-
Note:The rubber gasket surrounding the home button is very thin. To prevent the gasket from tearing, we recommend applying a minimal amount of heat.
-
Carefully run the tip of a spudger underneath the perimeter of the home button to separate it from the front panel assembly.
-
Lift and remove the home button assembly off the front panel assembly.
-
Display assembly remains.
-
The Touch ID function will ONLY work with your phone's original home button assembly, so you'll need to transfer the home button assembly from your old display assembly to your new display assembly to retain Touch ID.
-
Note:After reassembly, clean the touchscreen surface with an alcohol wipe prior to turning the iPhone back on. The alcohol helps dissipate any lingering static electricity, which can cause problems with the display.
-
Notice:After reassembly, connect the iPhone to an AC power source before turning it on for the first time. Once the iPhone has booted up successfully, you can disconnect the AC power.

